Ticket Counter & Booking Operations
The Bookings module is the primary working screen for front-desk ticket sellers, station cashiers, and agency operators. It handles ticket issuance, seat selection, boarding pass printing, reschedules, and cancellations.
The Fast Walk-In Ticket Sale (30-Second Flow)
When a traveler arrives at your ticket counter:
- Click Bookings in the left sidebar, then click Create Booking (or use the dashboard shortcut).
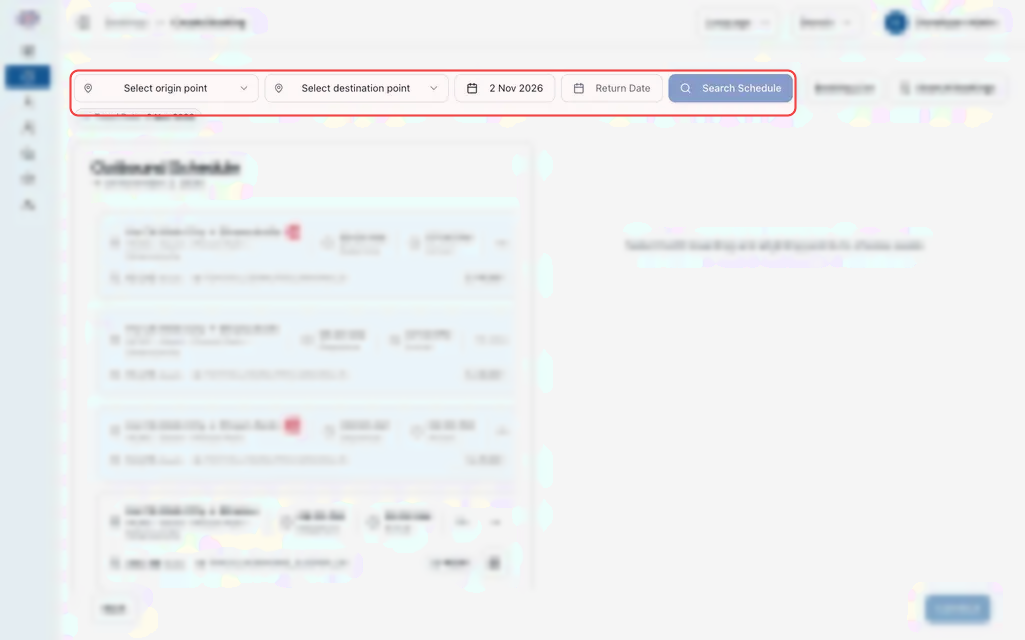 2. Search Schedule:
- Select the starting station (From) and arrival station (To).
- Select the Travel Date and click Search Schedule.
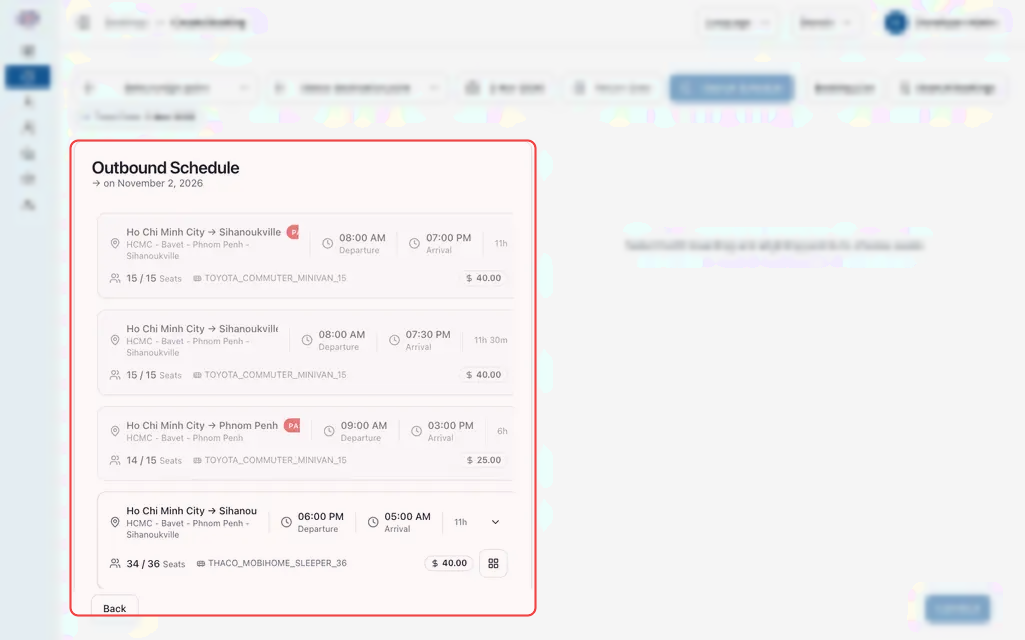
- Select Scheduled Trip:
- Review upcoming departures. Each card displays departure time, arrival estimate, bus type (e.g., VIP Sleeper, Executive Express), remaining seat count, and ticket fare.
- Click the desired trip card to open the bus seat layout.
 4. Choose Seats:
- Click available seats (white/green) on the interactive bus map.
- For double-deck sleeper coaches, use the Upper Deck and Lower Deck tabs to switch levels.
- Passenger Information:
- Enter the passenger's Phone Number (e.g.,
012 345 678). - Enter the passenger's Full Name.
- Select the specific Boarding Point (e.g., Central Station or Airport Highway Stop) and Drop-off Point.
- Enter the passenger's Phone Number (e.g.,
- Payment & Issue:
- Select the payment method: Cash, KHQR (dynamic QR code on terminal screen), or Agent Balance.
- If cash was handed to you, enter the collected amount in USD ($) or KHR (៛).
- Click Issue Ticket.
- Print Boarding Pass:
- The confirmation screen opens immediately. Click Print Ticket for thermal 80mm station printers, or Download Boarding Pass for A4 or electronic receipt sharing.
Group and Family Bookings
When one person is purchasing tickets for a family or group traveling together:
- Click all desired seats on the seat layout map (e.g., Seats
A1,A2,A3). - Enter the primary traveler's mobile phone number on the first passenger form. Automated departure alerts and SMS boarding reminders will route to this number.
- Enter individual passenger names for each seat so they appear accurately on the bus driver's boarding manifest.
- Review the combined Payable Amount before collecting payment. The system bundles all seats under a single Booking Reference (e.g.,
BK-10492).
Rescheduling a Ticket (Date or Time Change)
When a passenger requests to travel on a different bus departure:
- In Bookings, locate the reservation by typing the booking reference (e.g.,
BK-10492) or passenger phone number in the search bar.
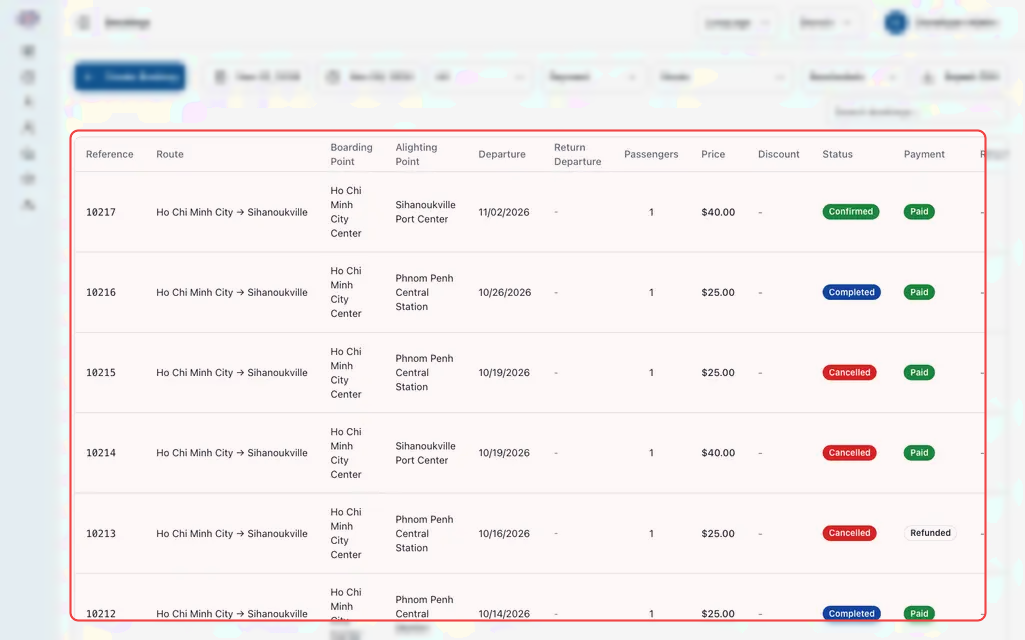 2. Click the booking reference or select View Details to open the ticket summary.
3. Click Reschedule Booking at the top right of the details card.
4. Select the new travel date and click Search Schedule.
5. Select the replacement trip and choose new seats on the layout map.
6. Review Fare Differences:
- Same Fare: No extra charge. Click Confirm Reschedule.
- Higher Fare (e.g., moving from Day Express to VIP Sleeper): Collect the difference and record the payment method.
- Lower Fare: Process the partial credit or cash difference according to your station refund policy.
- Click Confirm Reschedule and print a new boarding pass with the updated seat numbers.
Tickets cannot be rescheduled after the bus has departed or within the 24-hour departure cutoff window unless authorized by a Branch Manager.
Cancellations and Refunds
When a customer cancels their journey before departure:
- Open the booking record from the Bookings list.
- Click Cancel Booking.
- Select the Cancellation Reason (e.g., Customer Request, Medical Emergency, or Operational Disruption).
- Review the computed Refund Amount:
- The system automatically calculates the eligible refund percentage based on how many hours remain before scheduled departure.
- Confirm the refund method (cash payout at counter, bank refund, or agent credit).
- Click Confirm Cancellation. The seats are immediately released back to the public pool for other travelers to book.
Thermal Receipt Printing & Reprints
- Thermal 80mm Counter Printers: Clicking Print Ticket opens the compact receipt format optimized for point-of-sale thermal printers, including passenger name, bus plate number, seat assignment, departure time, and a QR code for driver check-in.
- Handling Printer Jams: If a printer runs out of paper mid-print, do not create a new booking. Simply open the booking in Bookings and click Print Ticket again. The system logs reprints in the audit trail without double-charging.
Troubleshooting & Counter FAQs
A seat shows gray (unavailable), but the customer claims their friend cancelled it earlier.
When a seat is clicked during booking, the system places a temporary hold to prevent double-booking. If someone started a reservation online or at another counter but did not complete payment, the seat remains locked until the hold timer expires (typically 10 minutes). Once expired, the seat turns green again.
Can I book a seat without collecting payment immediately (Pay-at-Station)?
If your user role has permission for Pay-at-Station holds, you can select Pending Payment. You must set a payment deadline (such as 2 hours before departure). If the customer does not arrive to pay by the deadline, the system automatically cancels the reservation and releases the seat.
The passenger's name has a typo on the printed ticket. Do I have to cancel the booking?
No. Open the booking details, click Edit Passenger, correct the spelling, and click Save. The updated name immediately syncs to the driver's boarding manifest without altering ticket numbers or payment records.